Hi there, in this post we’re going to deploy the latest version of Check Point Gaia OS – R81.
We’re going to download Gaia R81 and configure it as a security management server, to manage a pair of Gateways running Gaia R80.40.
We’ll also configure ClusterXL for High Availability and Identity Awareness, allowing us to create rules based on user identity.
The SMS we’ll be installed on VMWare Workstation as for the GW they will be running on eve-ng.
If you want to know how to deploy Windows Server 2019 as a domain controller, read my previous post:
https://www.linkedin.com/pulse/how-tos-deploy-windows-server-2019-domain-dns-sil%C3%A9sio-carvalho/
Let’s begin downloading R81 image from Check Point:
https://supportcenter.checkpoint.com/supportcenter/portal?action=portlets.DCFileAction&eventSubmit_doGetdcdetails=&fileid=109064
Once the download completes, we’ll create a New Virtual Machine on VMWare Workstation.
For the hardware requirements on deploying on open server, you can follow the recommend values from Check Point:
 1.png
1.png
I’ll be using different ones:
 2.png
2.png
Begin the installation process. Chose Keyboard language > Partitions Configuration (keep default) > admin password > IP Address
 3.png
3.png
Once this process is over, it will reboot.
Now let’s proceed with FTW (First Time Wizard) configuration via browser.
 4.png
4.png
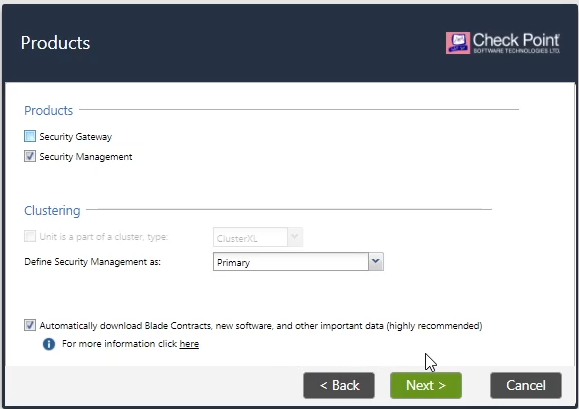
Continue with the configuration > Keep the management configuration > Set the hostname, Domain Name and DNS > Adjust the time > In Products page select only Security Management > Keep the admin user and finish the installation process.
 5.png
5.png
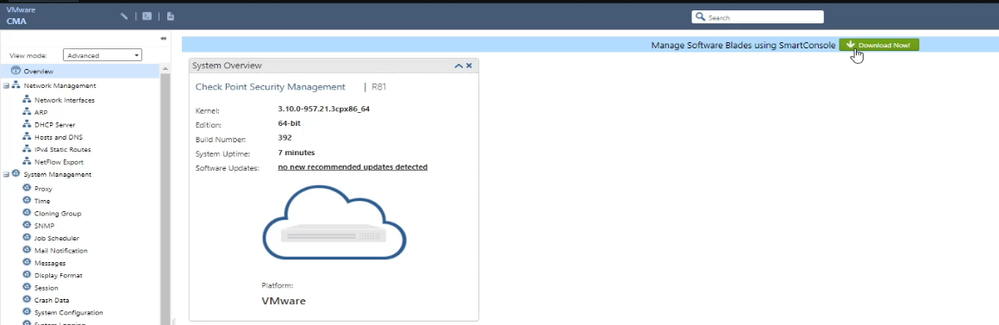
To manage SMS we have to download the SmartConsole client directly from Gaia portal and install it.
 6.png
6.png
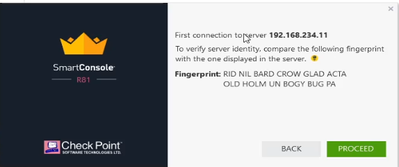
The first time we open SmartConsole it will request the admin credentials and SMS IP address.
 7.png
7.png
Accept the fingerprint and proceed.
 8.png
8.png
A big difference in this version is that now we can manage the licenses directly on SmartConsole.
 9.png
9.png
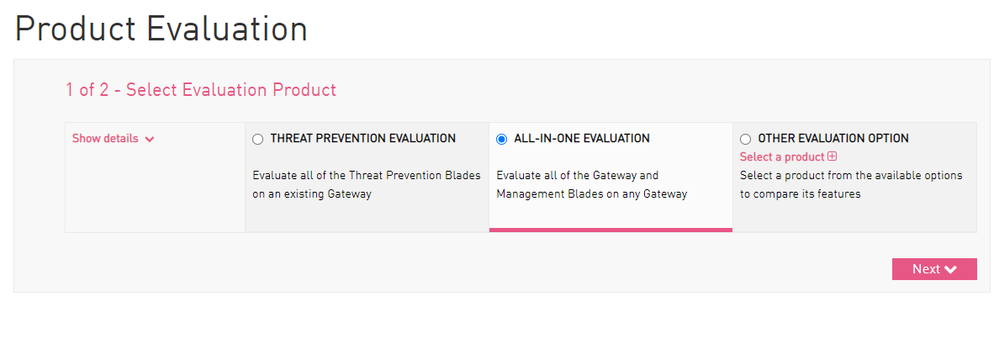
Download the licenses from Check Point user center, I usually choose ALL-IN-ONE EVALUATION option:
https://usercenter.checkpoint.com/usercenter/
 10.png
While adding the license you may get an error like the one below:
 11.png
Just add it again and wait a couple of minutes.
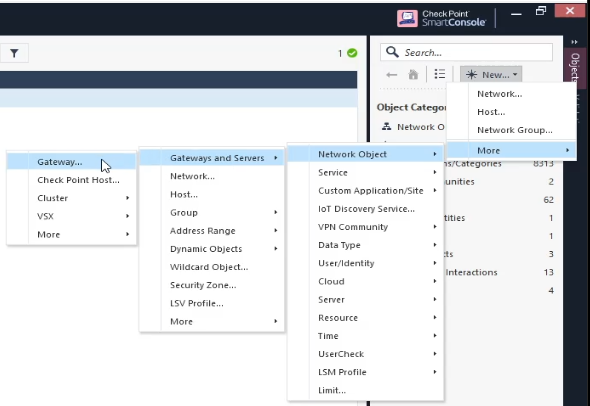
Next let’s add the gateways, by using the side bar New > More > Network Object > Gateways and Servers > Gateway > Classic Mode
 12.png
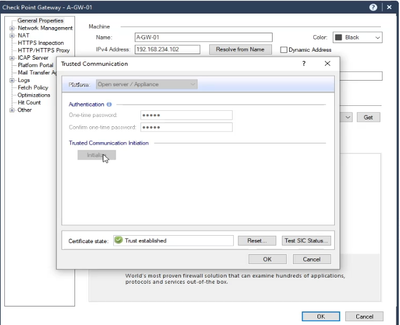
Fill the required information and establish the SIC Communication
 13.png
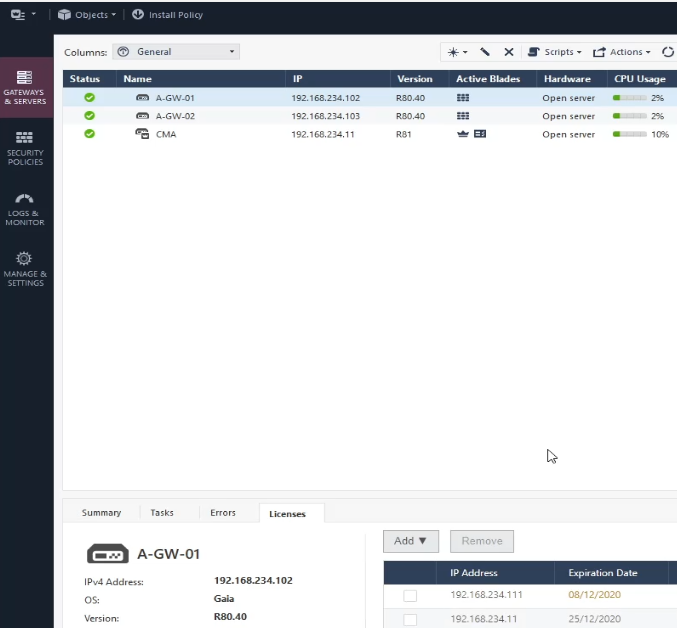
Add and attach the license for both gateways as well. I confess that I used SmartUpdate for this one, I'm used to it 🙂
 14.png
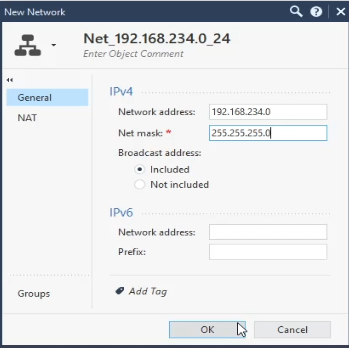
Now let’s see if everything is ok by creating a network object and a policy rule. In side pane New > Network
 15.png
Publish and install the policy.
 16.png
Until here, we have successfully deployed R81 as a Management Server managing two gateways running R80.40. Now let’s establish the link between the LDAP server and SMS.
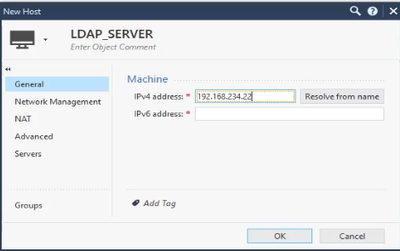
In side pane, choose New > Host and set the LDAP server IP address.
 17.png
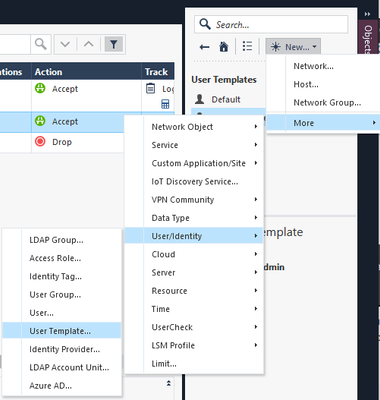
Now let’s create a user template object in side pane New > More > User/Identity > User Template…
 18.png
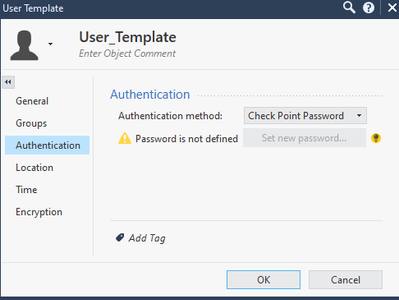
In Authentication tab choose Check Point Password
 19.png
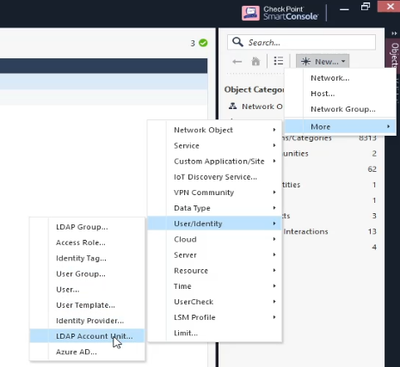
Next let’s create an LDAP Account Unit by using the side pane New > More > User/Identity > LDAP Account Unit
 20.png
Fill the required information.
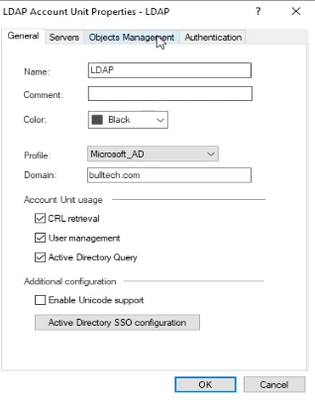 21.png
In Servers tab, add the LDAP Server object created earlier. To find a DN value of a user, use the following command in Windows Server CMD:
dsquery user -name <username>
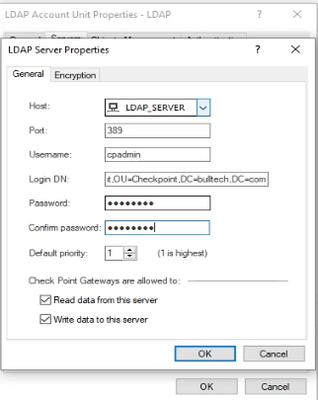 22.png
In the Objects Management tab, press Fetch branches.
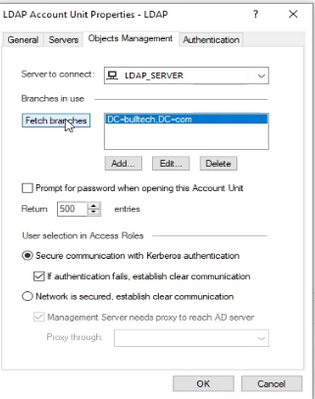 23.png
Lastly in authentication tab, as authentication schemes select Check Point Password and OS Password. In Users default values, pick the template created earlier.
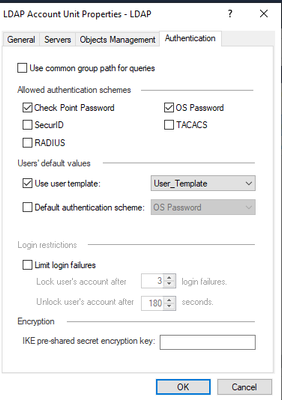 24.png
At this point we have established a link between SMS and LDAP Server. This will allow us to create rules based on user identification.
Finally let’s create a Cluster of both gateways, by using the side pane New > More > Network Object > Gateways and Servers > Cluster > Cluster…
 25.png
To add the gateways, we have to change the Platform Version to R80.40.
 26.png
Now in Cluster Members tab, add both gateways by selecting Add… > Add Existing Gateway…
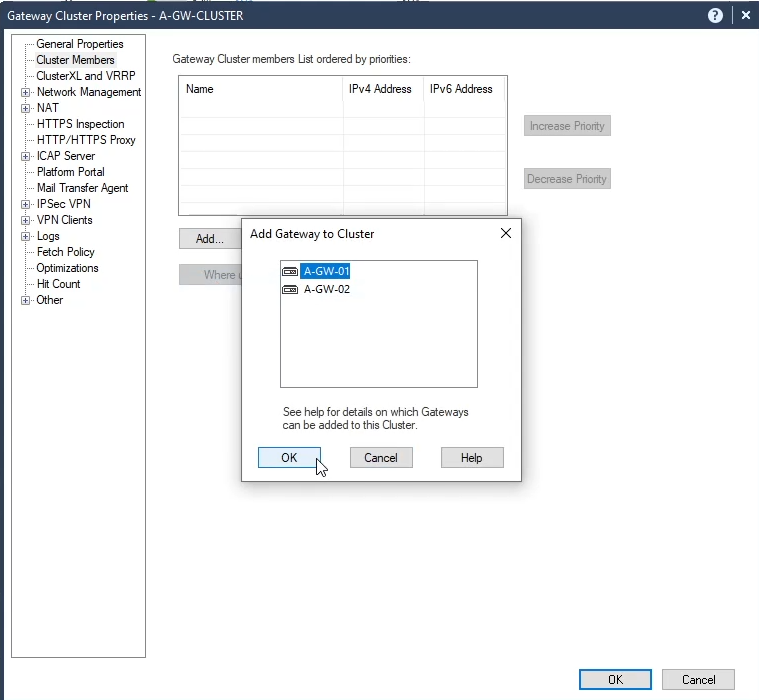 27.png
In Network Management tab, select Get Interfaces with Topology
 28.png
Set the VIP IP address and the cluster type.
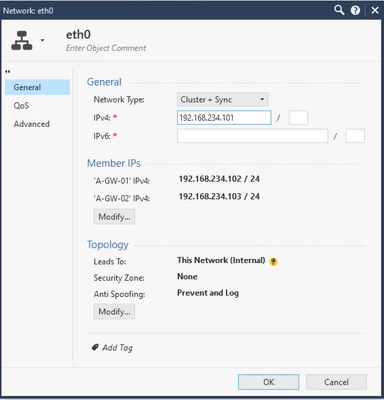 29.png
Press ok and install the policy.
That’s how you deploy Check Point Gaia R81 as a Security Management Server, managing a Cluster of Gateways.
I hope you enjoyed this post, leave your comments below and I'll see you on the next post.
Reference:
https://supportcenter.checkpoint.com/supportcenter/portal?eventSubmit_doGoviewsolutiondetails=&solutionid=sk166715