Hi there, in this post we’re going to deploy Check Point Identity Awareness.
First of all, we’re going to integrate our Active Directory (LDAP/AD) with Check Point Security Solution (CP).
This lab assumes you already have an AD deployed in the same network as the CMA and the Gateway.
We’ll start by creating a user with admin privilege in AD for CP.
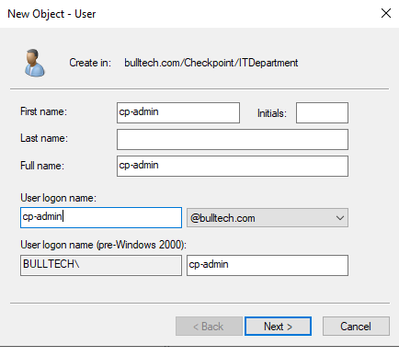 1.png
1.png
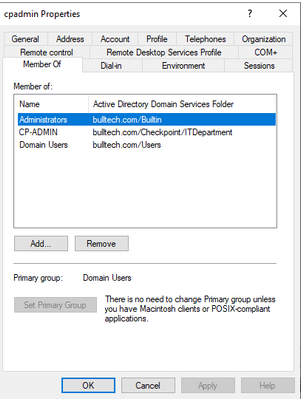 2.png
2.png
Once the user is created, let’s add an object in SmartConsole (SC) representing the AD.
On side bar click New > Host
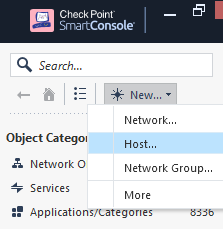 4.png
4.png 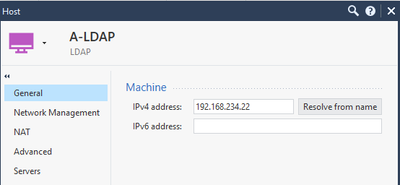 5.png
5.png
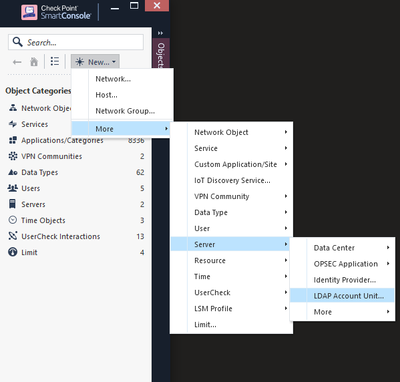
Now let’s create an LDAP Account Unit that represents branches of user information on one or more AD servers.
On side bar click New > More > Server > LDAP Account Unit…
 6.png
6.png
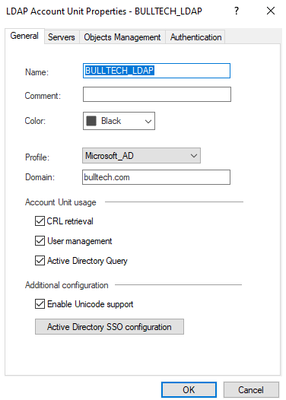
In General tab, fill the required information:
Name: ANYNAME_TO_REFERENCE_AD
Profile: Microsoft_AD
Domain: AD name / Domain name
Account Unit usage: select CRL Retrieval, User Management and Active Directory Query
 7.png
7.png
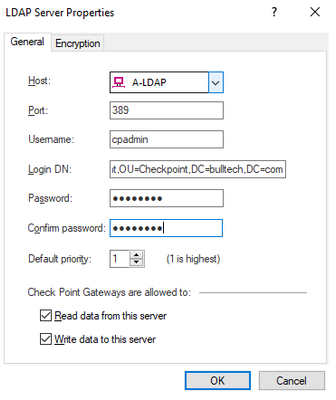
In Servers tab, choose Add…
To get the Login DN, run dsquery user -name cpadmin on AD (Windows Server 2019) cli prompt. It will give a similar output as below:
"CN=cpadmin,OU=ITDepartment,OU=Checkpoint,DC=bulltech,DC=com"
 8.png
8.png
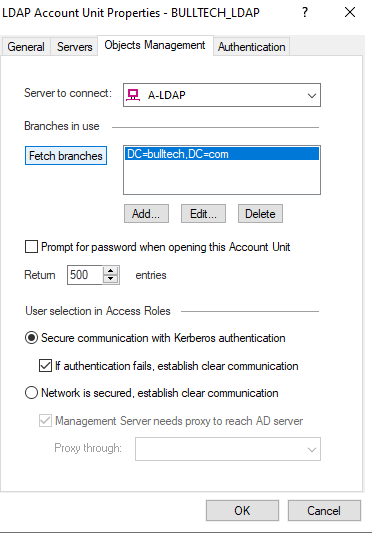
In Objects Management tab, select the server to connect and choose the option Fetch branches.
 9.png
9.png
Finally select the following the Authentication schemes:
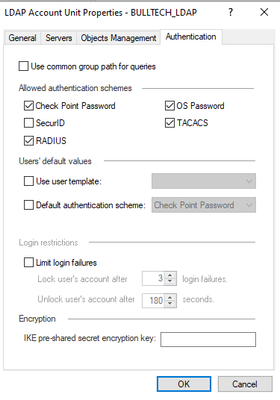 10.png
Press ok and publish the changes.
At this point we should be able to query the AD for users identities.
Now let’s enable identity awareness by selecting this option on gateway properties.
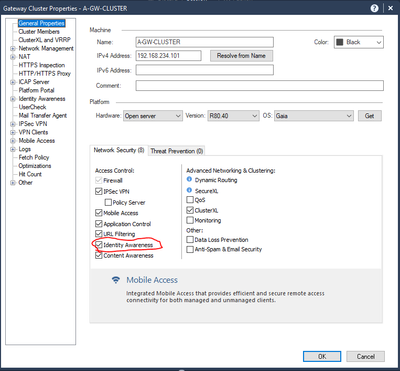 11.png
Select the options AD Query and Browser-Based Authentication
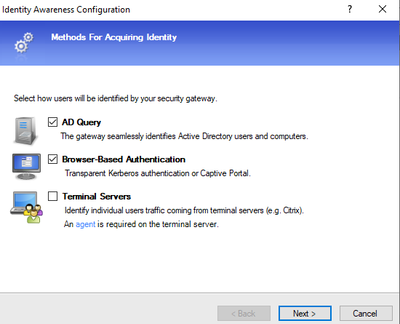 12.png
Now press connect.
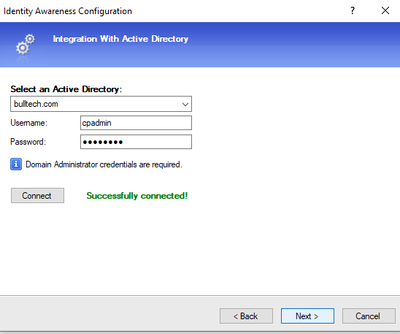 13.png
Next let’s install the policy to update the changes, so we can test this new feature.
Let’s create a simple rule policy like the one below with one additional layer:
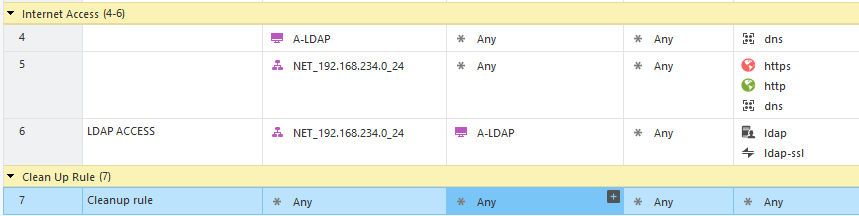 14.png
In Access Control pane, right click on it, and edit the policy.
In Policy Types > Access Control, click on plus signal and add a new layer
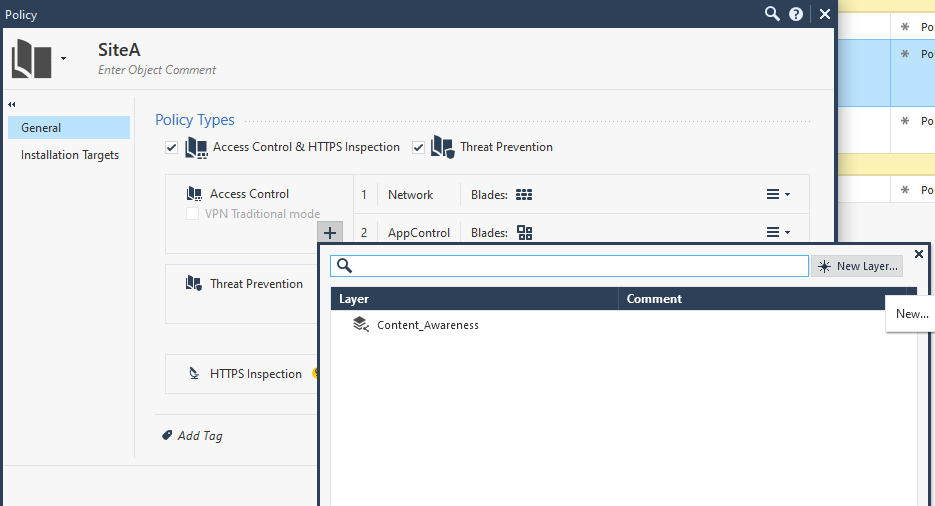 15.png
Disable the Firewall option and enable Applications & URL Filtering
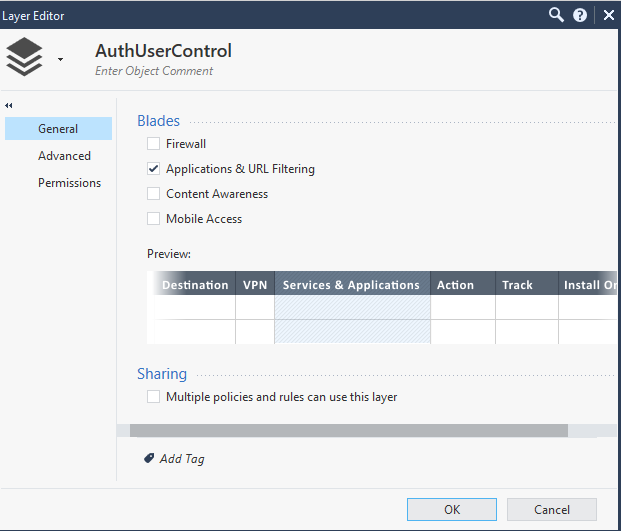 16.png
Press ok and create the following rules
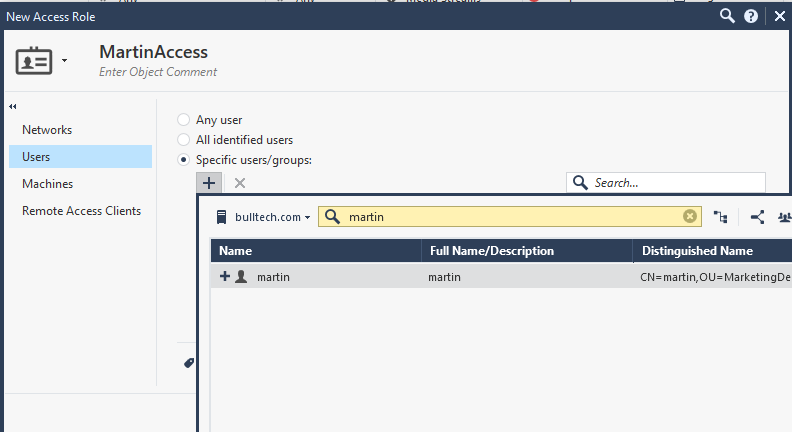
To specify the user or group we want filter, we’ll create an access role. For example, let’s allow only one user from marketing department.
In source field, click on plus sign and click on it.
In the new window, click on star sign, and choose Access Role…
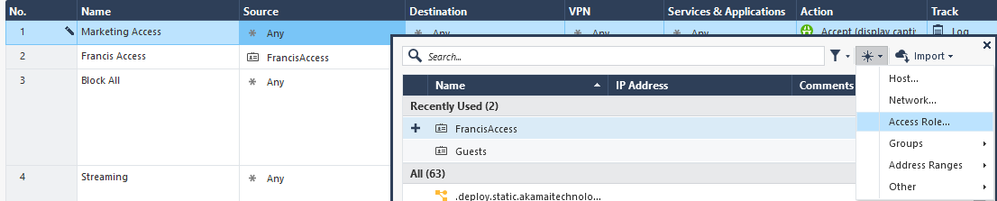 17.png
Give it a name, and query for a user you would to give access. In this case I chose Martin by accessing the Users tab > Specific users/groups.
 18.png
Install the policy and test the access.
 19.png
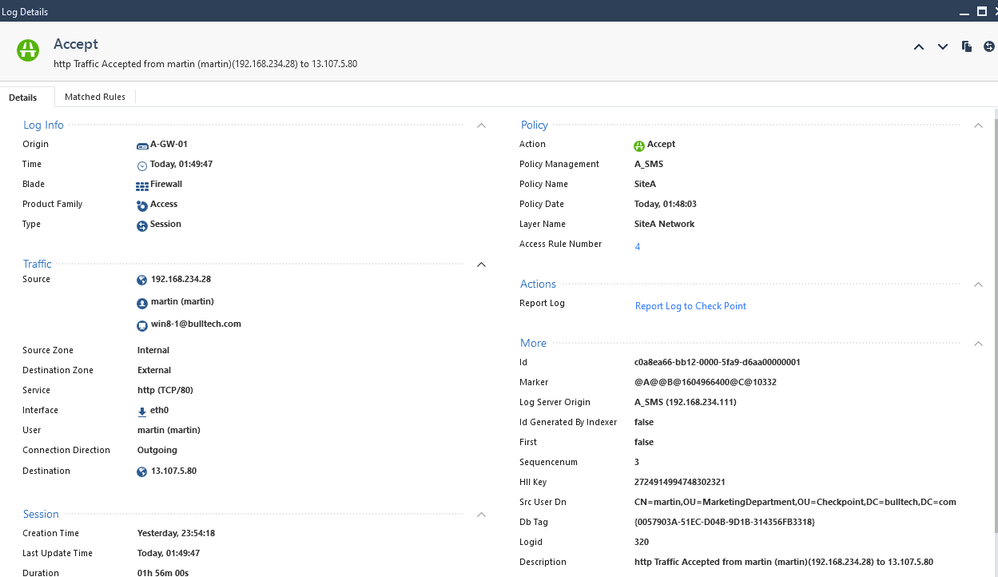
We can also confirm, that the policy is working has expected by looking at the logs.
 20.png
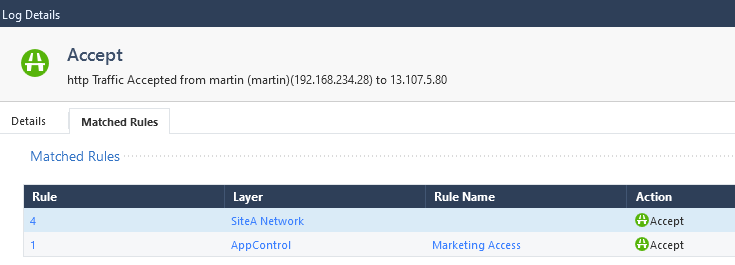
We see that the user martin, from marketing department was allowed to access the internet, according to our rules:
 21.png
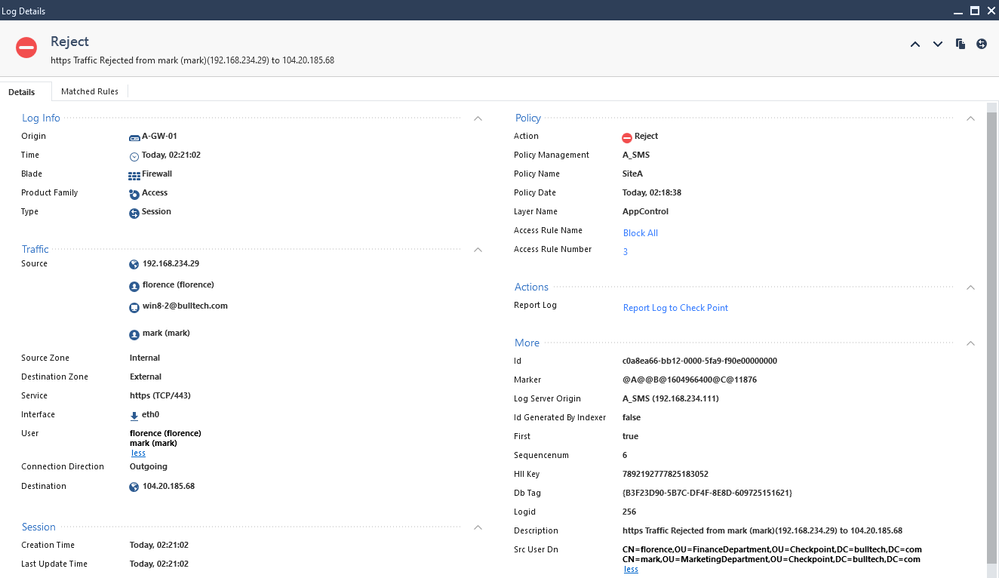
As for Florence and Mark, both are being blocked.
 22.png
Hope you enjoyed this post, leave your comments below and I'll see you on the next post.
References:
https://sc1.checkpoint.com/documents/R80.10/WebAdminGuides/EN/CP_R80.10_IdentityAwareness_AdminGuide/html_frameset.htm?topic=documents/R80.10/WebAdminGuides/EN/CP_R80.10_IdentityAwareness_AdminGuide/62050
https://sc1.checkpoint.com/documents/R80.30/WebAdminGuides/EN/CP_R80.30_IdentityAwareness_AdminGuide/html_frameset.htm?topic=documents/R80.30/WebAdminGuides/EN/CP_R80.30_IdentityAwareness_AdminGuide/62050